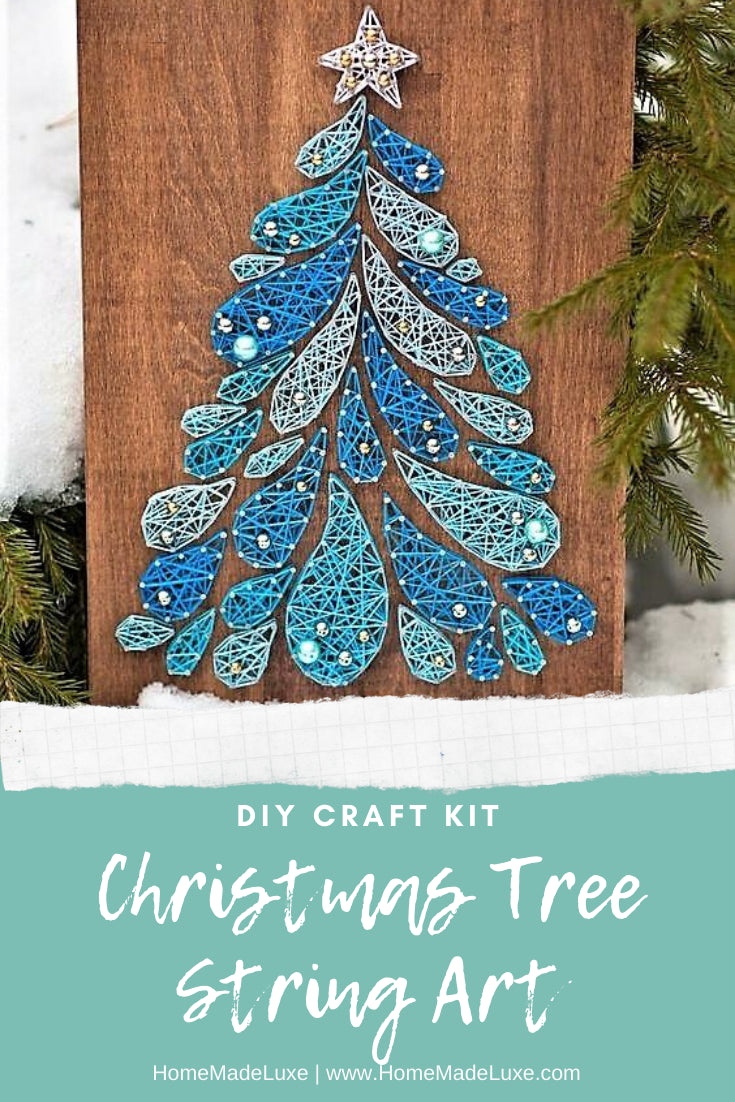
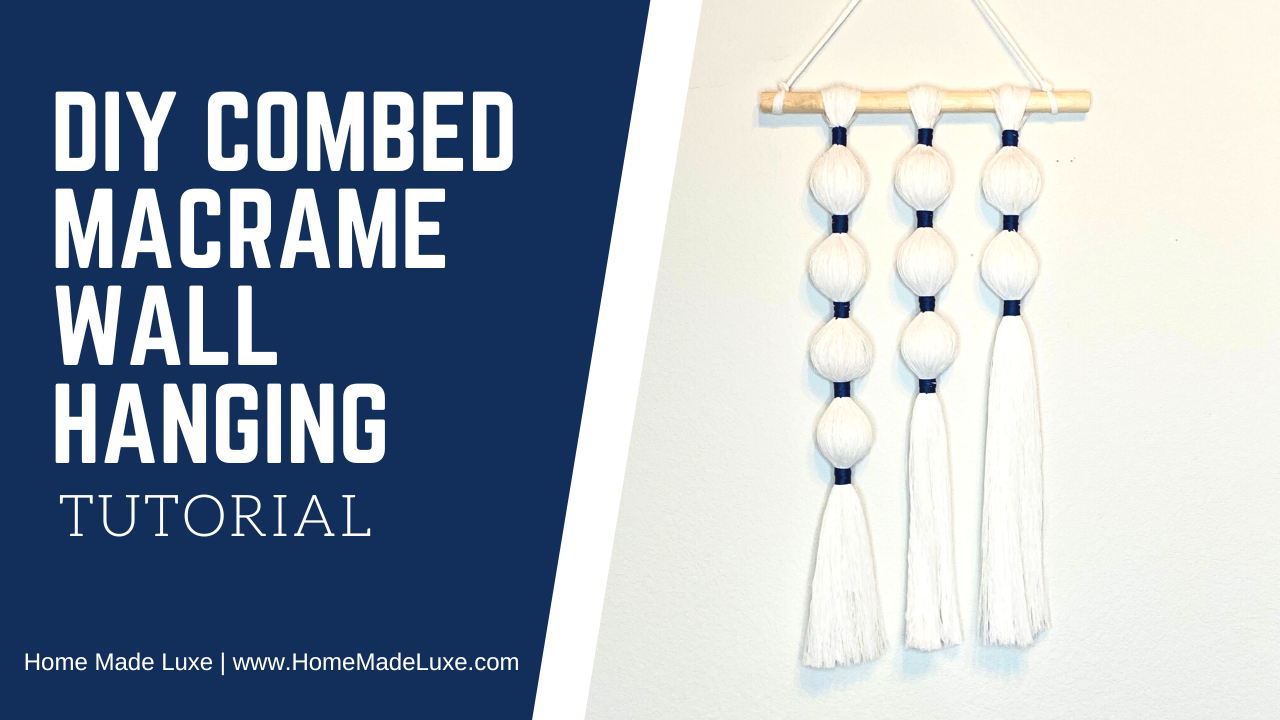
Looking for a fun and creative activity to pass the time? Look no further than this Combed Macrame Wall Hanging tutorial. In this blog post we will show you just how to create a combed macrame piece then you can customize the design to your liking.
If you're looking to make this even easier you can grab all the materials for this craft here with our Combed Macrame Wall Hanging Craft Kit. This kit contains everything you need to create a stunning piece of macrame wall art, including an instruction booklet with easy-to-follow steps.
Whether you're looking for a relaxing hobby or a unique gift for a craft-loving friend, our Combed Macrame Craft Kit is sure to impress. Order yours today and unleash your inner artist!
Home Made Luxe DIY Combed Macrame Wall Hanging Craft Kit
or
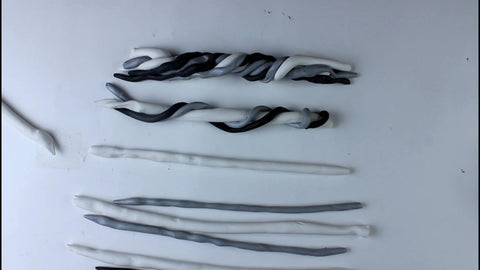
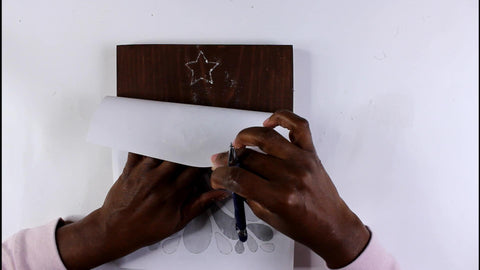
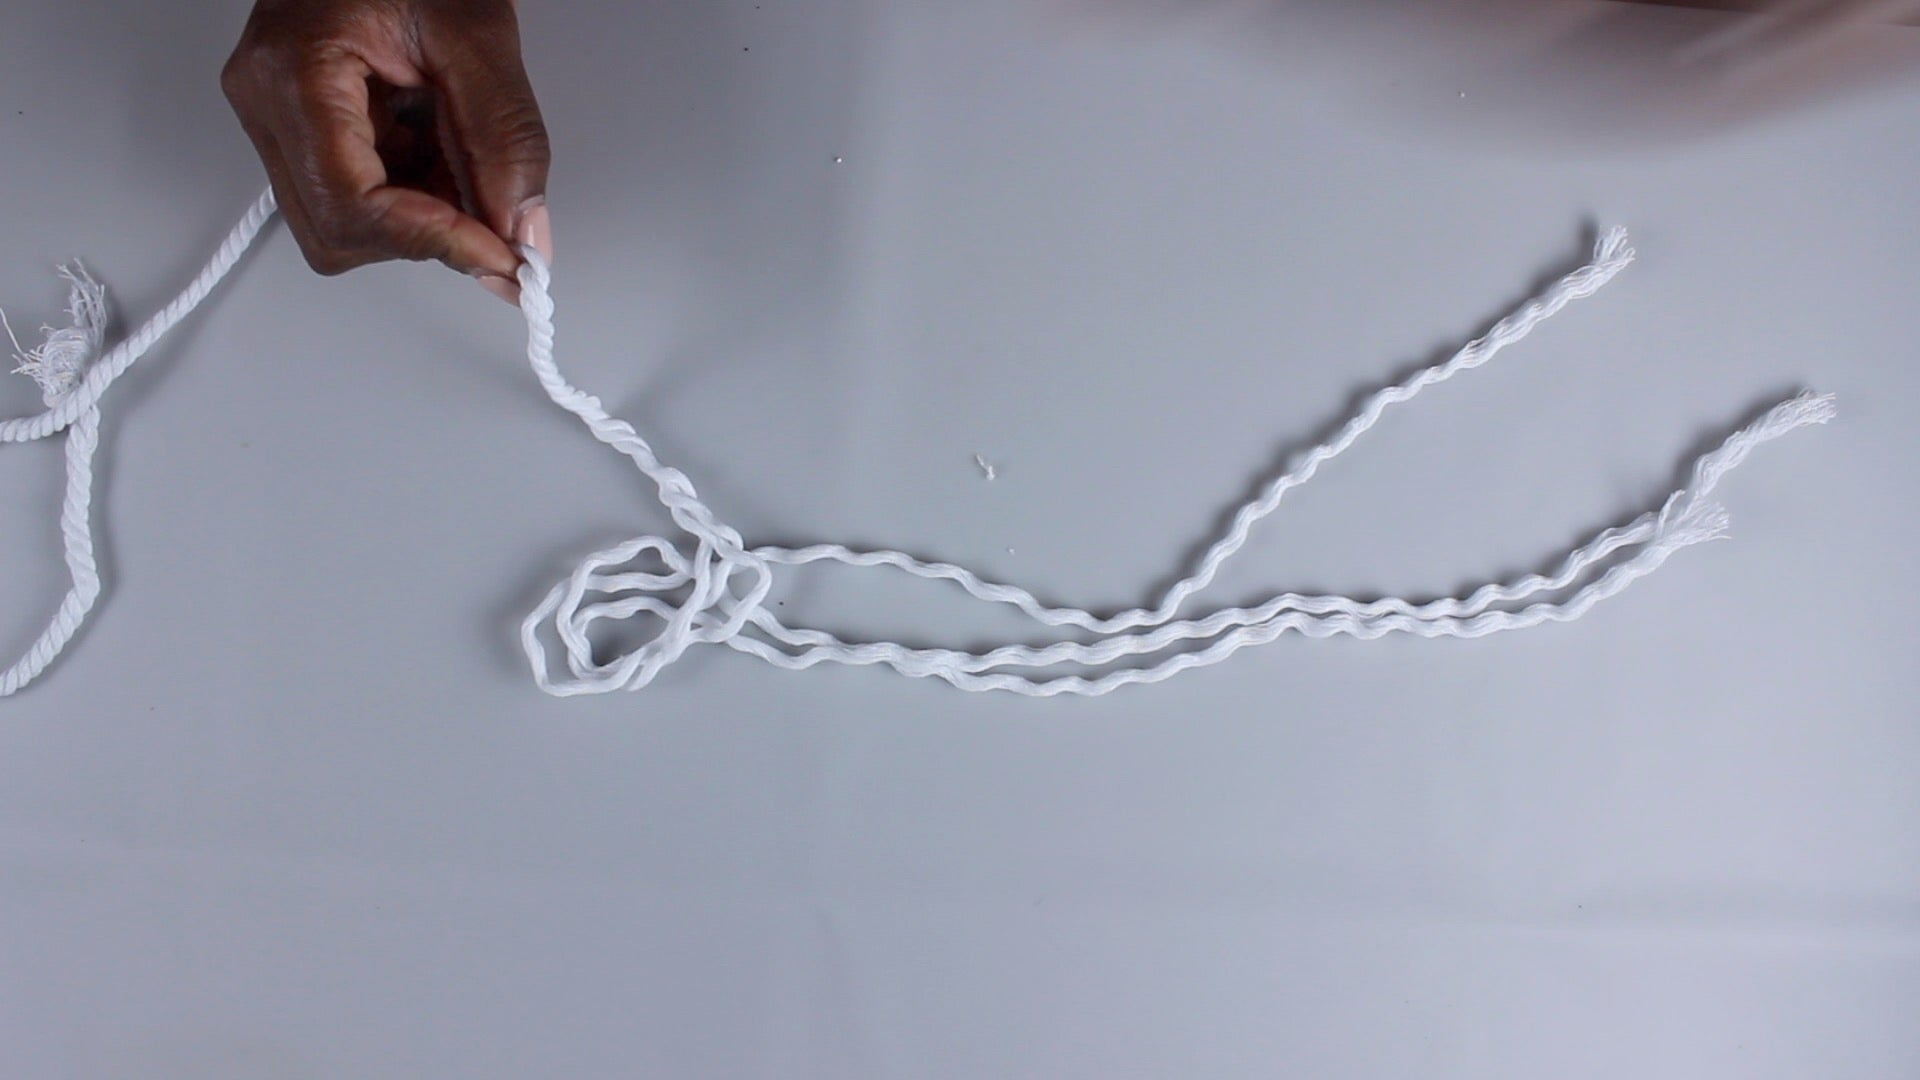
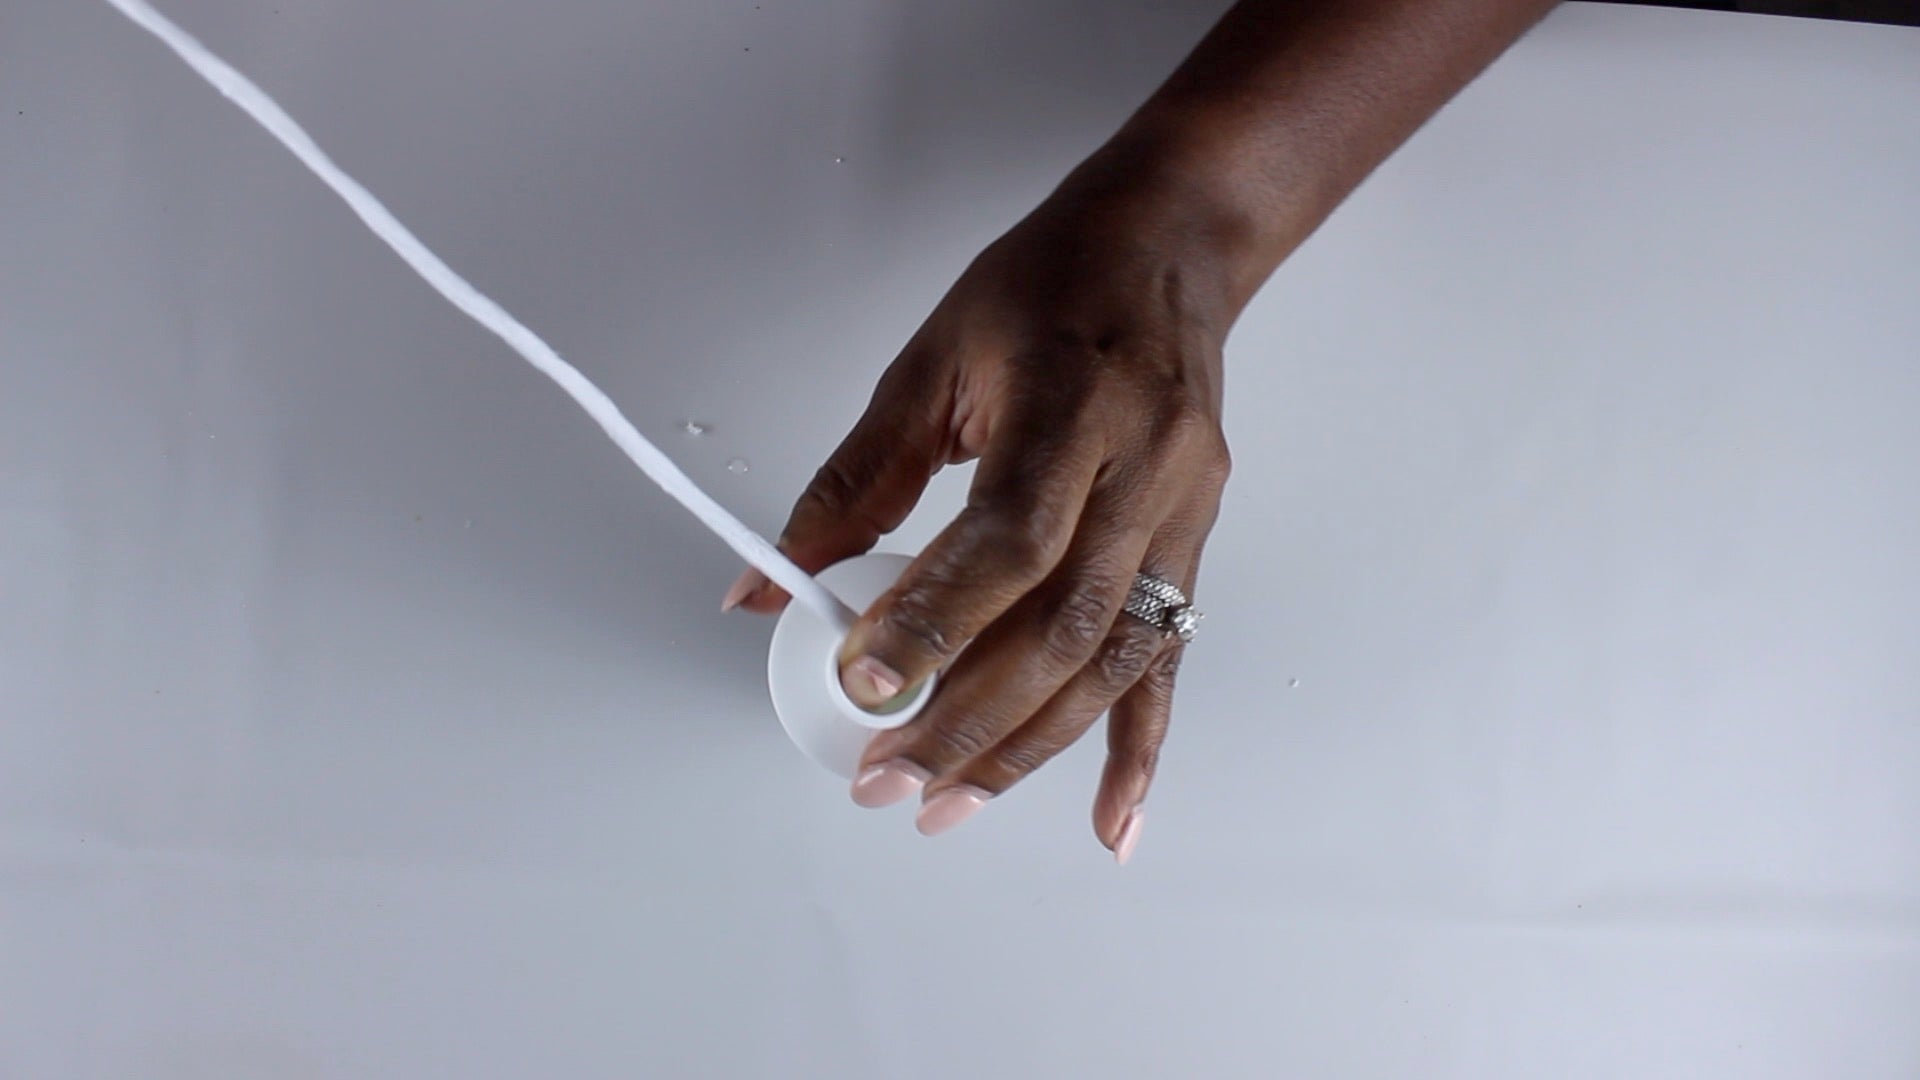
1) Cut macrame cord into 10 60" pieces. Set 3 cords to the side and do not unravel them. Unravel other pieces of yarn into the 3 separate cords. Dip each separated cord into the fabric stiffener.
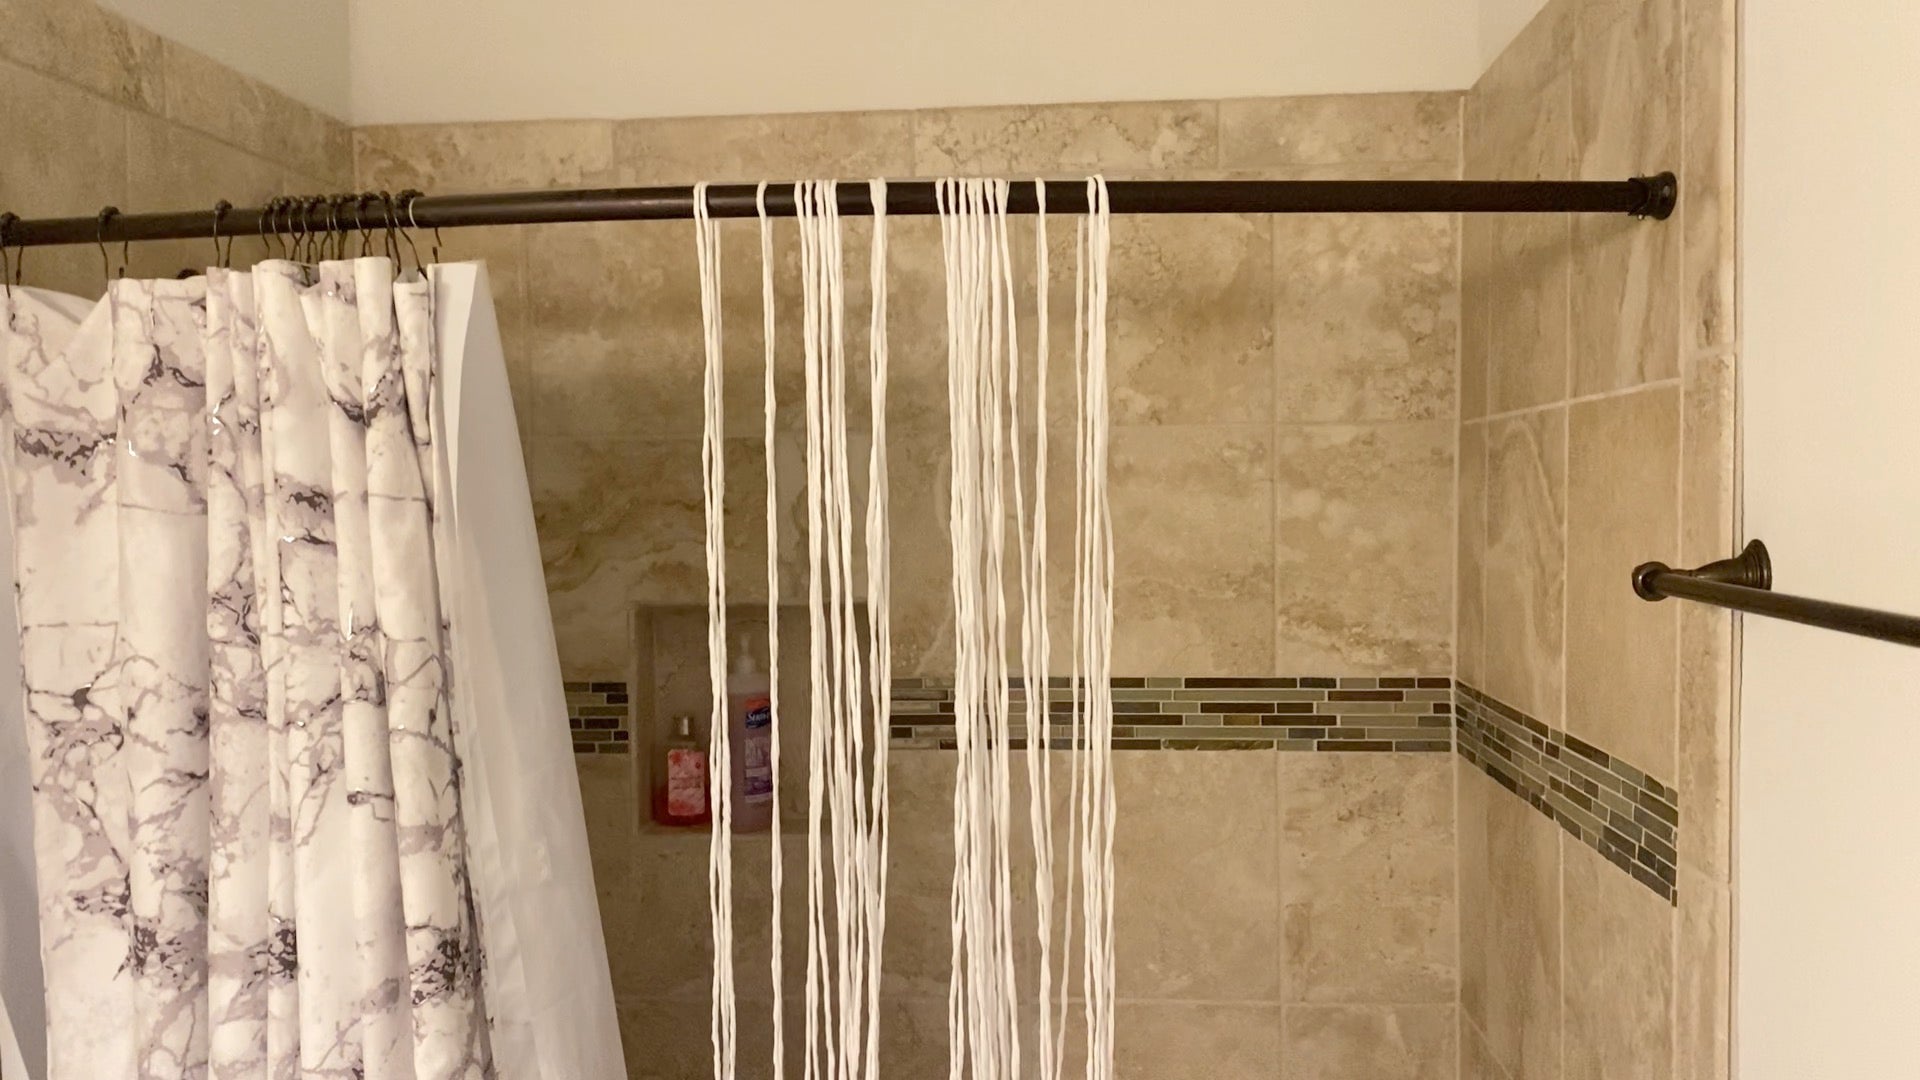
2) Place your finger over the yarn at the opening as you pull the cord out to squeeze excess stiffener out. Hang wet strands of yarn over a shower curtain rod to dry about an hour but best overnight.
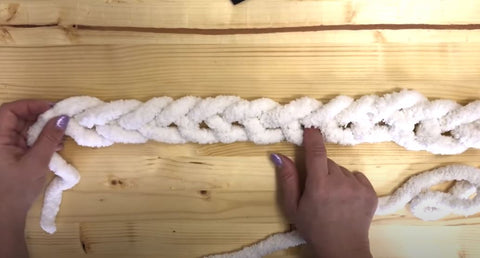
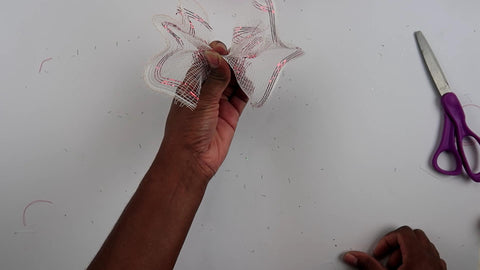
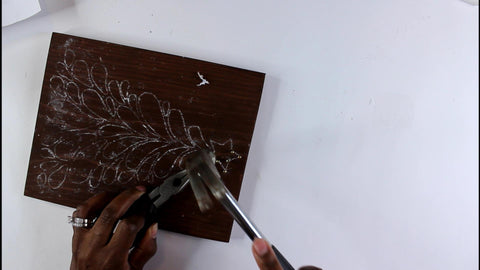
3) Once dry and while still hanging, start at the bottom with combing your cord out. use your fingers to separate any tangles. Use the brush to further detangle. Combine 6 of the cords together & brush
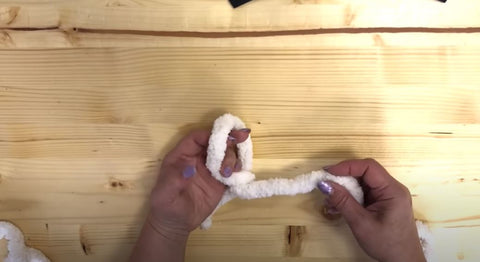
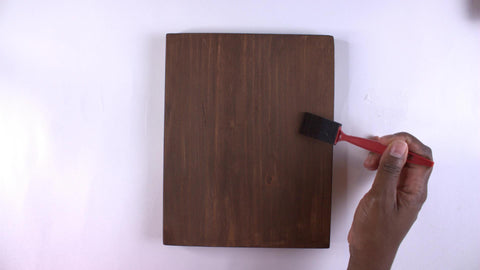
4) Hang your wood dowel (i used a hook on the back of a door) and add one of the pieces of the still twisted cord to the dowel with a larks head knot.
5) Combine 6 of the combed cords into a bunch and brush together. Place bunch on top of the twisted cord and use a short piece of unraveled cord to tie a knot to secure right below the dowel. Trim ends.
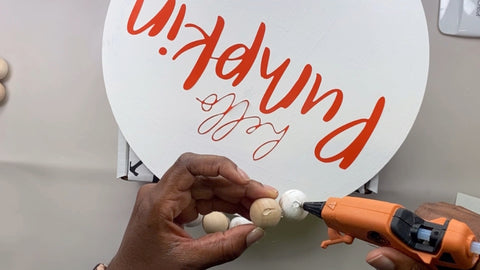
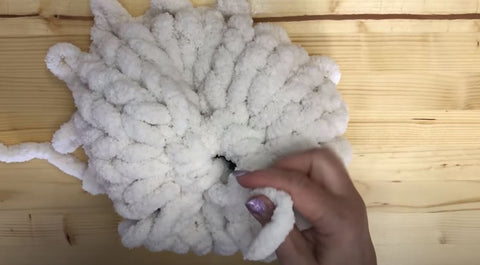
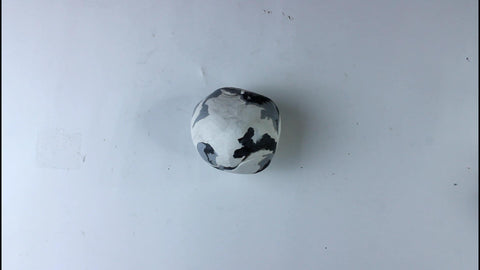
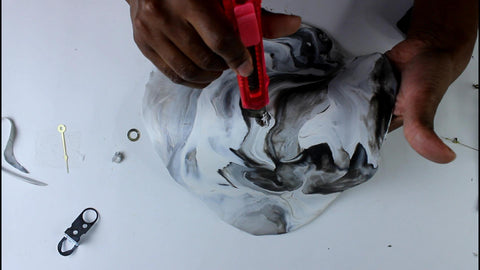
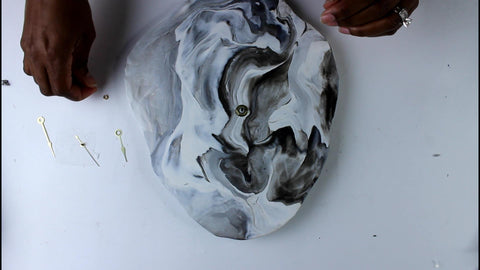
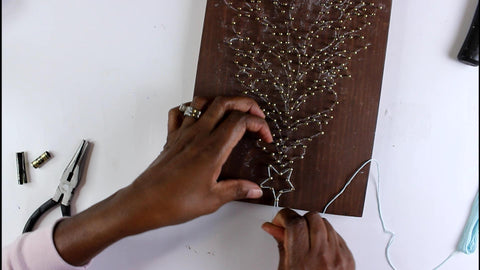
6) Use a gathering knot to add embroidery floss to the top and trim ends. Make the section of floss as wide as you wish. Use a screwdriver to create a large hole in each of the styrofoam balls.
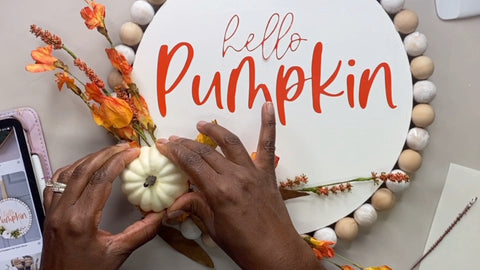
7) Push the twisted cord through hole in foam ball & push up under floss. Smooth combed macrame around the ball combing as needed. Tie a knot under the ball to secure with a small piece of yarn.
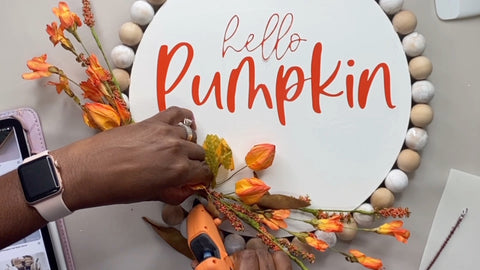
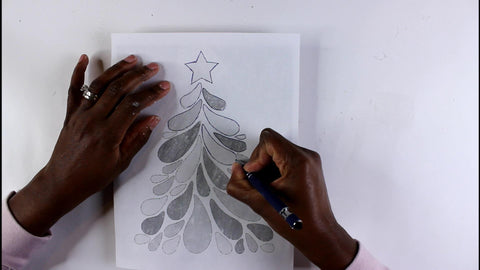
8) Repeat process with embroidery floss & foam balls in your desired design. Once complete. Trims combed ends into a straight line.
]]>
Home Made Luxe Joy Ornament String Art Craft Kit
or
<coming soon>
1) Sand wood plaque as needed. Dust then stain the plaque.
2) Once dry, tape the string art template to your plaque
Home Made Luxe Wood Pumpkin Trio DIY Fall Decor Craft Kit
or
<coming soon>
1) Prepare pumpkins & bases for paint by sanding as needed. Paint pumpkins & bases orange or white all around. We chose to paint two pumpkins orange and one white. Let dry.
Home Made Luxe Hello Pumpkin Wood Bead Fall Decor Craft Kit
or
<coming soon>
1) Paint wood round white. If desired, paint half the beads in white as well. You could also water down the paint to white wash the beads. Let wood and beads dry completely (24hrs is best).
Home Made Luxe DIY Felt Flower Wood Heart Craft Kit
or
]]>
Home Made Luxe DIY Macrame Wall Hanging Craft Kit
or
1) Cut strands as follows: 14: 70" strands 4: 80" strands 2: 27: strands Fold the 70" strands in half and use a larkshead knot to secure them to the dowel
2) After making the 14 larkshead knots. Make a square knot with the first 4 strands. (See pg 6-7 for knot instructions). Repeat square knots with next 4 cords until all cords on row are knotted.
3) On the next row, skip first 2 cords on the left and continue making square knots until the you have 2 cords left at the right.
4) Next, skip 1st 4 cords on the left & continue making square knots until you have 4 cords left on the right. On next row, skip 6 cords on the left and make 3 square knots leaving 6 cords at the end.
5) Skip first 10 cords and make 2 square knots, leaving 10 cords on the other end. On the next row make one square knot with the middle 4 cords.
6) Hold the left cord to the right and create double half hitch knots with each cord on the left hand side. Continue until you get to the middle.
7) Repeat on other side. Take the right cord & hold it over to the left & create double half hitch knots. In the middle, put the left cord on top of the right cord & create a double half hitch knot.
8) Repeat to create another row of double hitch knots. Fold 80" cords to 60" on one side & 20" on the other. Hang cord to left of the dowel with larkshead knot so long side is on the left & short on right.
9. Add second cord on the left so long end is on the right & short end is on the left. The 4 cords should have long cords on the outside & short ends on the inside. Repeat this process on the right side.
10. Create spiral knot on the left hand side by repeating the first half of the square knot. i.e. create a 4 and pull right cord though the loop and repeat until the spiral is about 8" long.
11. Repeat making spiral knots on the left side by making backwards 4s and pull the left cord through the loop. Create knots until the spiral knots are about 8".
12. Use the 27" cord to create a gathering knot to connect the two spiral knot ends. Make U with the end of the 27" cord and place on top of the two spirals.
13. Wrap the long end around the spirals about 7 times & make sure the short end is popping out on top. Put the long end through the loop created & pull the short end that is on the top.
14. Cut the short end off on the top. And cut all the cords on the gathering knot straight across about 4" below the gathering knot.
15. Cut the left, right and middle cords 8" below the last knots on those rows. Then cut the other cords into a v to fit the lengths cut. Unravel the cords on the gathering knot and comb if desired.
16. Take the 27" cord and tie each end to the dowel between the spirals and the square knots. Use this loop to hang your piece. You did it! Enjoy your wall hanging!
The most exciting part of this is the process. You can mix and match or even experiment with any color you want to create.
This is a Home Made Luxe craft kit project, and everything you need to create this kit is in the kit! or head to the craft store and find the below materials. i
Home Made Luxe Latch Hook Wall Hanging Craft Kit
or
1) Decide on a design for your hanging, you can be creative as you go or use a sharpie to draw a design on your mat. The bottom should have longer strands of yarn & get shorter as you get to the top.
2) Cut desired color yarn strands 12" long & start with bottom row. Fold the yarn in half & slip the hook through the middle of the loop. Once yarn is at bottom of tool, make sure the latch is open.
3) Push your latch hook up underneath the first square in the row and push the hook until the latch sits above the bottom line of the square. Pull the yarn up and to the left.
4) Pull the yarn to the right, between the latch and the hook, and then wrap it around the back of the hook.
5) Keeping holding the yarn in your left hand & pull the latch hook tool down with your right hand until the latch closes. Continue pulling the latch hook through the square to create your knot.
6) For longer sections you can do every other square to save on yarn & time. Continue adding sections in different colors and different lengths.
7) Cut sections with a straight or wavy edge, or cut very short for a pile look. You can also change the texture of the yarn by unraveling the strands with a comb or brushing out the strands of yarn.
8) Once finished, add yarn to top for hanging and use hot glue to fold the top over. Add felt to the back to finish and cut excess as needed. Post your creation online & tag @homemadeluxe.
Let's get started with the procedure. Everything you'll need for this project is included in the kit. So take a seat and let's get started. All you have to do is follow the step-by-step instructions and have fun with the process. You may do this on your own or with the help of a friend!
Order this craft kit, here! (All the materials that you need are in here) => This is a DIY subscription box project from Home Made Luxe, and with just one click here in the DIY kit you can get it now!
Home Made Luxe Wood Round Wreath Craft Kit
or
1) Paint wood sign with white and black blocks in any design you wish, be sure to add some blocks with no paint (ie the natural wood). Use painters tape if desired for crisp lines. Let dry.
2) Paint your 'home' wood script in your desired color, we chose black. Pull apart your eucalyptus stems and add to your wood round in your desired spot (leave room for your bow).
3) Cut some ribbon to create a hanger and hot glue the ribbon loop to the back top of wood round. Create a bow with your ribbon and hot glue it between your eucalyptus stems.
4) Glue home script to wood. Add seasonal flowers to keep this wreath up all year & add felt to the back to protect your door if needed. Post your creation on social media & tag us @homemadeluxe
Home Made Luxe Pumpkin Wreath Craft Kit
or
1) Scrunch the end of your orange burlap and add a chenille stem to the end. Turn the wreath form over and use the stem to secure the burlap to the last ring of the wreath form.
Check out the easy steps below as well as the quick video tutorial for this super fun DIY Monstera Leaves Punch Needle Kit.
Home Made Luxe Monstera Leaves Punch Needle Craft Kit
or
1) Unscrew the top of the hoop & place the inside hoop on the design, flip over so the design is on the back & add the outer ring. Adjust until the design can be seen in all areas.
Grab this craft kit Here (all materials you need for this project are in the kit) => https://homemadeluxe.com/collections/all-products-for-shop-page/products/this-months-project-resin-cheese-board
Check out the easy steps below as well as the quick video tutorial for this amazing DIY loom weaving tapestry.
Home Made Luxe DIY Loom Weaving Tapestry Craft Kit
or
Grab this craft kit Here (all materials you need for this project are in the kit) => https://homemadeluxe.com/collections/all-products-for-shop-page/products/loom-weaving-tapestry-craft-kit
Check out the easy steps below as well as the quick video tutorial for this amazing DIY loom weaving tapestry.
Home Made Luxe DIY Loom Weaving Tapestry Craft Kit
or
]]>
Create the perfect Spring and Easter decor with this gorgeous, unique felt flower wood bunny kit. You will learn how to create several felt flowers while creating the cutest DIY bunny decor with this kit.
Grab this craft kit Here (all materials you need for this project are in the kit) => https://homemadeluxe.com/collections/all-products-for-shop-page/products/diy-felt-flower-wood-bunny
Check out the easy steps below as well as the quick video tutorial for this super fun DIY Wood Bead Wreath.
Home Made Luxe DIY Felt Flower Wood Bunny Craft Kit
or
1) Use the white paint to paint your wood bunny. Apply one coat for a rustic look. Or let first coat dry and apply a second coat for a more finished look.
2) Begin by cutting out your rose template & tape it to your desired colored felt. Cut out the felt using the template & begin creating your roses as below.
Create chrysanthemums of different sizes.
Learn how to make a gorgeous, unique wood bead wreath with this wood bead spring wreath kit. This super easy wreath makes the perfect crafty gift.
Grab this craft kit Here (all materials you need for this project are in the kit) =>
Check out the easy steps below as well as the quick video tutorial for this super fun DIY Wood Bead Wreath.
Home Made Luxe DIY Wood Bead Wreath Craft Kit
or
1) Locate welded part of metal hoop. Gently apply pressure back and forth to welded joint until it opens.
2) String wood beads on metal hoop leaving a little room at opening. (We love the natural look of the beads but feel free to whitewash or stain if you so desire.)
It may not feel like it today but Spring is coming! Learn how to make a gorgeous, unique wood bead wreath with this wood bead spring wreath kit. This super easy wreath makes the perfect crafty gift.
Materials Included: Wood Beads in Natural, Steel Ring, Peonies, Roses, Glue Stick, Photo and Video Instructions
Other Items needed: Glue Gun
Craft level: Beginner
Check out the easy steps below as well as the quick video tutorial for this super fun DIY Paper Quilling Monogram Letter.
Home Made Luxe DIY Paper Quilled Monogram Letter Craft Kit
or
Another one of our favorite quilling tutorials from genius crafter Annigen Creates
1) Trace the letter or letters of your monogram onto your cardstock with a pencil. You may print out the letter from HERE for your reference if it is your preferred font.
Check out the easy steps below as well as the quick video tutorial for this super fun DIY Hand Knit Round Pillow.
Home Made Luxe DIY Hand Knitted Pillow Craft Kit
or
Check out this tutorial from our friends at BeCozi Yarn
1) Make a loop by placing working yarn (the yarn you are working from) on top of tail (the end of the yarn). Leave about a foot of tail on the end.
We would love to see your creation! Please post your pillow on social media & tag us @homemadeluxe
Check out the easy steps below as well as the quick video tutorial for this super fun DIY Ornament Christmas Tree Sign.
Home Made Luxe DIY Ornament Christmas Tree Sign Craft Kit
or
1) Use sandpaper to smooth the wood plaque if needed. Paint the wood plaque white and allow to dry.
This is a Home Made Luxe craft subscription box project, which means you can purchase this as a craft kit here! That's right no craft store nightmare trying to find all these materials just grab the craft kit !
Check out the easy steps below as well as the quick video tutorial for this super fun DIY sun hat spring wreath!
Home Made Luxe DIY Elf Holiday Wreath Craft Kit
or
1) Add tinsel stems to the outside and inside rounds of the wreath base. This should be about 12 stems.
This is a Home Made Luxe craft subscription box project, which means you can purchase this as a craft kit here! That's right no craft store nightmare trying to find all these materials just grab the craft kit !
Check out the easy steps below as well as the quick video tutorial for this super fun DIY sun hat spring wreath!
Home Made Luxe DIY Macrame Mandala Craft Kit
or
This is a Home Made Luxe craft subscription box project, which means you can purchase this as a craft kit here! That's right no craft store nightmare trying to find all these materials just grab the craft kit !
Check out the easy steps below as well as the quick video tutorial for this super fun DIY sun hat spring wreath!
Home Made Luxe DIY Sun Hat Spring Wreath Art Craft Kit
or
1) Remove ribbon from hat (this may require cutting). Then add your included ribbon by hot gluing it to the base of the hat and tying a knot.
2) Create a bow with two long tails. Cut the tails into a v to create a nice finish.
3) Lightly write your word on the top of the hat across from the bow. Possible words are: Hello, Hello Spring, Hello Sunshine, Welcome, Home Sweet Home, Blessed, or even your last name!
4) Once you get the word as you like, fill in to desired thickness. Pull flower heads and leaves off of their stems. This is easily done, they will pop right off.
5) Arrange the flowers around the brim of the hat until you like the arrangement, then hot glue to hold flowers in place. Add leaves to arrangement if desired.
6) Arrange the flowers around the brim of the hat until you like the arrangement, then hot glue to hold flowers in place. Add leaves to arrangement if desired.
7) Cut 12 inches of ribbon, fold in half and glue together to create a loop. Glue this loop to the back of the hat or placement. Be sure to center loop above your text.
8) Hang and enjoy your unique Spring Wreath! Don't forget to post it on social media so we can see your creation (tag us @homemadeluxe).
Looking for easy DIY Valentine's Day home decor? These projects are so much fun and creative. They're simple and easy to DIY.
Check out our amazing list of DIY Vday decor that are perfect for your home or as a gift to a friend or loved one!
Learn how to make this lovely Valentine' Day decor! The best part is its also available as a DIY craft kit with all the materials you need to create this kit at Home Made Luxe. Learn more or Grab this kit here!
Super easy and quick to make!
source: http://bit.ly/2S6A0UN
Here is another DIY Valentine's Day decor that is super easy and fun to make! This is also available as craft kit from Home Made Luxe so you can make your own for your home or as a gift! Get your kit with all the materials you need here!
This no-sew Vday table runner is so simple but full of love!
source: http://bit.ly/2uclliK
This Valentine's Day flower wreath is absolutely gorgeous!
source: http://bit.ly/2uOWHVE
Anyone can make this Vday tree! But they definitely add a lot of character to any space!
source: http://bit.ly/2RLlCCd
These canvas art with DIY paper flowers are so quick and simple to make! This project is available as a DIY craft kit with all the materials you need! Get your kit here!
This pompom garland are not just great for Valentine's Day but any day of the year!
source: http://bit.ly/37MyVIv
Aren't these pretty? They're super simple to make too!
source: http://bit.ly/2tnyfu8
Gotta love these heart studded, no sew throw pillow!
source: http://bit.ly/36O941n
This Valentine mailbox is not just a great storage for Vday cards but also a super cute decor!
source: http://bit.ly/36LWdN5
Aren't these pine cone roses super adorable? Definitely super quick and easy to make!
source: http://bit.ly/2vxIjBh
You'll definitely would love to hang this canvas not just for Valentine's Day but all throughout the year!
source: http://bit.ly/38YbQ5D
How cute is this Valentine's Day clock? Such a beautiful item to hang on your wall!
source: http://bit.ly/2uW2c4B
This DIY birdhouse Valentine box will definitely make your space a lot more interesting!
source: http://bit.ly/36SyUl2
Did you love our list of easy DIY Valentines home decor? Which one you'd like to make this week for your home?
Enjoyed this post? Check out our Coffee Bar Round Up post for more inspiration. Happy crafting!
]]>
This is a Home Made Luxe craft subscription box project, which means you can purchase this as a craft kit here! The craft kit contains all the materials you need below to this string art project. That's right no craft store nightmare trying to find all these materials just grab the craft kit you won't be sorry!
Home Made Luxe DIY Felt Flower Rope Sign
1) Use the white paint to paint your pallet sign. Apply one coat for a rustic look. Or let first coat dry and apply a second coat for a more finished look.
2) Hot glue rope to pallet to create a circle. Be sure to glue the section where the two ends meet on a side that will be covered by your felt flowers.
3) Begin by cutting out your rose template & tape it to your desired colored felt. Cut out the felt using the template & begin creating your roses using the instructions on your template.
4) Secondly cut out your rosette templates and follow the directions on the template to create rosettes in your desired colors. Remember to choose a contrasting color for the inside of your rosette.
5) Thirdly, follow the directions to create Chrysanthamums of different sizes.
6) Use green felt to create leaves of different sizes and shapes.
7) Arrange flowers and leaves on rope and wood until desired placement is achieved. Then use glue gun to secure flowers to the rope then the leaves to the wood.
8) Hang and enjoy your felt flower sign! Don't forget to post it on social media so we can see your creation (tag us @homemadeluxe).
]]>
This is a Home Made Luxe craft subscription box project, which means you can purchase this as a craft kit here! The craft kit contains all the materials you need below to this string art project. That's right no craft store nightmare trying to find all these materials just grab the craft kit you won't be sorry!
Home Made Luxe DIY Marbled Clock
1) Start by working small sections of clay in your hands (separately) to soften them up. Then roll into long rope shapes. The silver & black ropes should be thinner than the white.
2) Combine all the ropes into one big rope by twisting the ropes together. Roll the rope out and fold in half and twist again. Repeat one more time (don't over twist on this step to avoid over marbling)
3) Create a ball with the rope and use a rolling pin to roll into a flat circle about a 1/4" thick. Decide which type of clock you would like: Circle (or other shape), Freeform or Table top.
4) If you're creating a circle clock, use a plate to cut a circle shape with a knife or freehand to cut any shape you would like. Or leave in a freeform shape.
5) To create a table top clock, use edge of book or table to create a large lip on bottom of the circle clock.
6) Use knife or straw to cut a circle in the middle of the clock for the clock hands. Be sure that the middle is no more than 1/4" thick, & make sure the hole is as wide as the clock mechanism so it will fit.
7) Put clock on baking sheet in oven at 275 for 15 mins. Remove from oven and let cool completely. Brush on gloss glaze and let dry. Add gold paint to accent sides of clock if desired.
8) Attach clock mechanism and hands per box instructions. Enjoy your clock and post it on social media so we can see which one you made (tag us @homemadeluxe).
]]>
This is a Home Made Luxe craft subscription box project, which means you can purchase this as a craft kit here! The craft kit contains all the materials you need below to this string art project. That's right no craft store nightmare trying to find all these materials just grab the craft kit you won't be sorry!
Home Made Luxe DIY Christmas Tree String Art Craft Kit
1) Paint your wood plaque with the walnut stain provided.
2) Take christmas tree template and cover the back (the non printed side) heavily with chalk.
3) Turn the template back over and place on the wood (printed side up). Be sure to center the tree on the plaque
4) Use a pen to trace every line of the template. Be sure to apply enough pressure that the chalk will adhere to the wood. Lift up the template to reveal the chalk outline on your wood.
5) Starting from the top of the tree, add nails to the first section (the star) to outline. Use your pliers to hold the nails while you hammer.
6) After adding nails to each section, add the colored floss according to the template & finish that section before moving to the next. Start with tying the floss in a knot onto a nail to secure.
7) Once secured, use floss to outline the section by winding floss around each nail in the section. Once outlined begin stringing inside of the section to cover as much as of it as possible.
8) Keep string snug and tie a knot on the final nail to secure. Cut excess and tuck under the section to hide. Continue the process of nailing and stringing each section until completed.