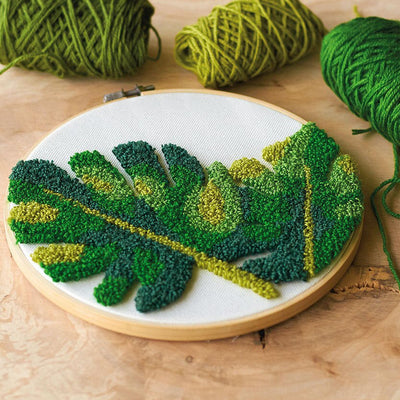
Monstera Leaves Punch Needle Tutorial

monstera leaves punch needle tutorial
Learn the skill of punch needling with this super cute Dimensions Monstera Leaves Punch Needle craft kit. 
 
Grab this craft kit Here (all materials you need for this project are in the kit) => 
This is a Home Made Luxe craft subscription box project, which means you can purchase this as a craft kit here! That's right no craft store nightmare trying to find all these materials just grab the craft kit.


Check out the easy steps below as well as the quick video tutorial for this super fun DIY Monstera Leaves Punch Needle Kit. 


Materials Needed:

Home Made Luxe Monstera Leaves Punch Needle Craft Kit

or

  • 8" Embroidery Hoop
  • Leaf Printed Fabric
  • Premeasured Wool Yarn in Assorted green Colors
  • 2.2mm Adjustable Punch Needle
  • Punch Needle Threader
  • Scissors

DIY Monstera Leaves Punch Needle Video Tutorial:


DIY Monstera Leaves Punch Needle Tutorial

1) Unscrew the top of the hoop & place the inside hoop on the design, flip over so the design is on the back & add the outer ring. Adjust until the design can be seen in all areas.

 paper quilling letter tutorial


2) The fabric should be taut, if it loosens as you punch retighten & continue. Choose your starting point and refer to chart for needed yarn. Pull the three strands of the yarn apart.
paper quilling tutorial
paper quilled letter
3) Thread the punch needle per the packing directions with 1 strand of yarn. Then adjust & set the needle to setting 3. If you desire longer loops you can set to 4 or 5 or shorter loops 1 or 2.
paper quilled letter monogram
paper quilling monogram tutorial
4) Start punching & be sure to follow these tips: The slanted side of the needle should always point forward as you stitch forward. Hold needle perpendicular ie straight up/vertical as you punch.
5) Push needle all the way down into the fabric, when you pull up, barely lift the tip off the fabric & slide a short distance then push down again, you should never lift too high off the fabric.
6) Begin by outlining an area & then fill it in by following the direction of the outline or doing rows. Make sure the yarn can freely flow from the end of the punch needle. Cut any ends as needed.
7) When the yarn ends, rethread & continue. Once done with a section, clip the end on the loop side. To change direction move the hoop not the needle.
8) To finish your piece, trim the ends of the fabric then glue the fabric to the back of the hoop. Enjoy your punch needle project!  Post your creation on social media & tag us @homemadeluxe

Leave a comment

Please note, comments must be approved before they are published

This site is protected by reCAPTCHA and the Google Privacy Policy and Terms of Service apply.